The water jacket started much like the furnace with the tube being held by its finished OD so it could be bored out but leaving a smaller diameter at the far end and a similar locating spigot at the top.
Some 5mm plate was bored out a little undersize and then a larger counterbore was machined to accommodate the spigot on the tube.
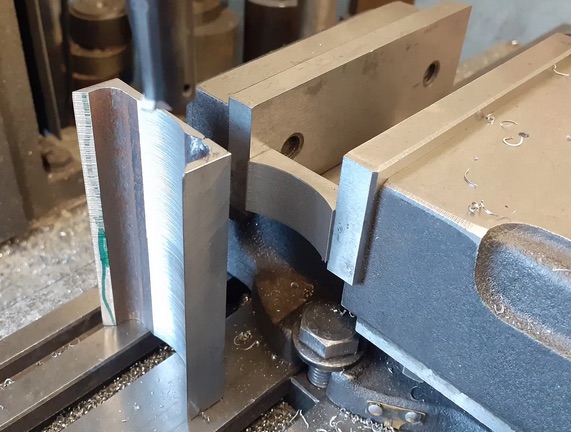
There is a flat down one side of the jacket and rather than cut this from solid which would have been a big lump to heat up for silver soldering I opted to weld two pieces of angle iron together. This shot shows the weld being machined flat, though final machining will be done after soldering.
I then used the boring head to cut the other side to a curve to match the jacket, also did the block that the water pump fits to at the same setting.
After soldering and a pickle, the assembled parts were then treated much like you would a casting; here the top plate has been bored to size and the bottom end 0.2mm smaller so that the liner will drop in most of the way before it becomes tight. The plate was also faced to bring the overall length to finished size.
The bottom just needed drilling and tapping for some bolts that will hold the hot cap in place
With the jacket firmly held between two angle plates the flat side was milled down to the correct offset from the centre of the jacket, six holes tapped to attach it to the frame and I have just milled out the clearance slot for the flywheel with a 6mm cutter with 1mm corner radius to leave an internal fillet for that cast look.
The block for the pump was also milled down to the final projection, drilled and tapped. The water passage was also drilled and counterbored for a sealing O-ring.
A bit more drilling and tapping on the top surface finishes the jacket off, and this time they will hold the beam pivot bracket in place.
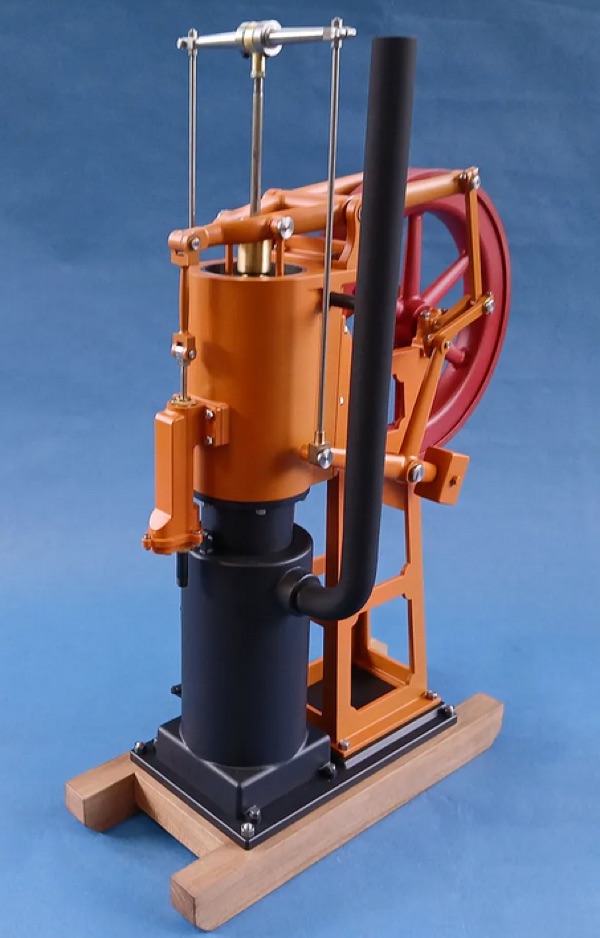
Part 1 here part 2 here part 3 here Part 4 here