Lathe cutters
The first requirement is for the T&CG to be able to set grinding angles by way of guides so that relief angles are included. The actual relief angles are not that critical but generally as long as a leading edge of a cutting tool does the cutting and the chips have room to clear then metal will cut with ease. For lathe tools, I tend to keep to a basic rule of 5 degrees for relief angles and use a fine diamond hone to dress the cutting edge after grinding so that it is free of grinding serrations and very sharp.
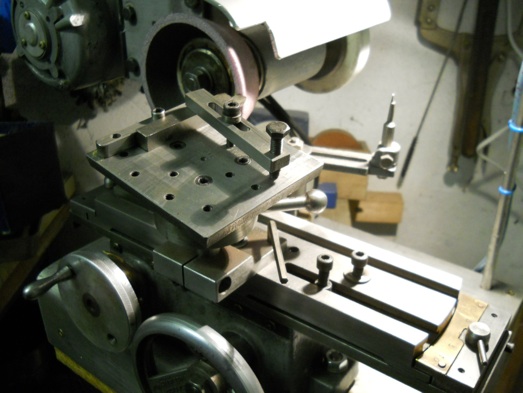
The tool rest I made for lathe tools as an attachment for the Stent (Fig. 2) was at the time an experiment in making a ball joints (similar to a photographic tripod head) but basic hinged guides are perfectly suitable and using any such guide ensures correct angles. Free-hand grinding on the bench grinder is quite effective and quick but a T&CG ensures the correct angles and ‘flat’ sides rather than sides matching the grinding wheel radius. While such tools having a radius side cut well they do not present the best relief angle since a radius is a continuously changing angle! Added to which, the cutting edge is often weak and has a tendency to chip or lose its keen cutting edge.
Milling cutters
Sharpening milling cutters requires the use of a T&CG as it is completely impossible to grind freehand. Milling cutters are relatively expensive and once again industry has moved on to insert cutters or ‘throw-away’ cutters – for them sharpening is simply too costly in terms of time and accuracy.
Once again, in the home workshop time is not a major problem and one can easily get five or more re-sharps for each milling cutter including end and side cutting edges. Accuracy clearly suffers in terms of diameter since a new 0.5in. diameter cutter is reduced after every grind but this really does not matter and is in many cases an advantage! To mill a 0.5in. slot theoretically is done using a cutter 0.5in. diameter but in practice, on a small (less mass) mill, the end result will be a slot too wide. Slot cutters (two cutting edges) are to be preferred but often still cut wide. Multiple cutting passes allows the machine operator to concentrate on a single ‘sizing’ side of the slot thus absolute accuracy.
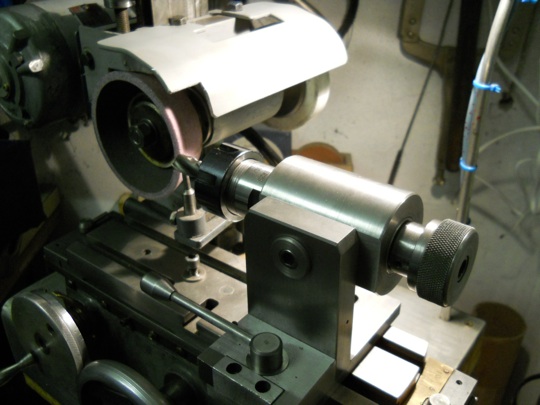
First, consider sharpening the end teeth cutting edges. I made a jig (Fig. 3) for the Stent which was largely based on a design by Brookes and utilised ER25 collets and holder to ensure rotational accuracy. It is a fallacy to get wound up with extreme accuracy and as long as the collets can produce a minimal run-out then the cutter will work fine.
The key requirement is for the jig to have some form of indexing to cater for two, three or four cutting edges and for relief angles to be set. I tend to always use the same angles, 5 degree for primary and 15 degrees for secondary when used to cut mild steel but these can be adjusted for other materials. The Stent has a table, on which the jig is fixed, which also rotates about its centre and being 10in. long provides easy and accurate setting of very small angles.
In the case of end teeth cutting edges I have found that it is better for the centre of the cutting edge to be slightly lower (‘dished’) than the outer edge. This prevents a tendency for the cutter to skid and makes a cleaner cut. The angle is only about 0.5 degree and the rotating table on the Stent makes this a very simple task to set up.
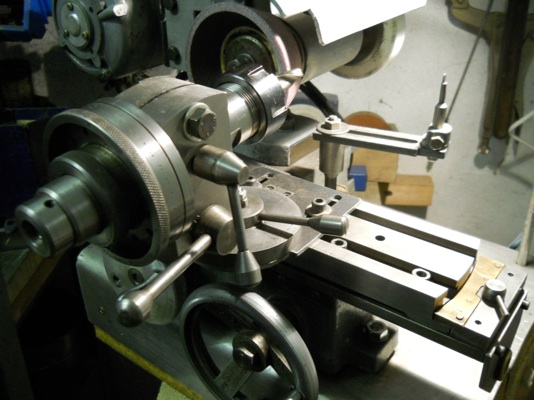
Next, consider the side cutting edges of a milling cutter. These are more complex because they are in a helix profile along the length of the cutting edge and once more a jig (Fig. 4) is required.
This is a simple jig which again uses ER25 collets and holder which rotate in ball bearings. The ER25 collet holders come in all shapes and fortunately a parallel shank is available. The jig is made such that the spindle arrangement can be retracted away from the grinding wheel by a simple lever/hinge under spring pressure. A lever retracts or engages the cutter to be ground and if you start grinding from the cutter end towards the collet end then it is necessary to move the cutter away from the grinding wheel when the grinding is finished for an edge to enable the jig to be moved back to the start position.
Grinding these helix edges is actually very simple. A lip rest is needed to set the cutting edge height and if the complete table including the jig is transverse and the collet holder is kept under hand pressure to rotate it to be in contact with the lip rest then the cutting edge is ground uniformly along the cutter length. This may seem difficult but is actually very simple and requires a short amount of practice to produce a good clean ground edge.
The major difficulty when grinding and sharpening tools is to remove the minimum amount of the tool for each grind. This may seem obvious but in practice is difficult. To sharpen any cutting edge needs very little grinding as you are just establishing a new cutting edge. From personal experience I find that the trick is to recognise when cutters are worn by seeing and hearing the performance of the cutting edge and chips produced. Once a cutting edge breaks down then the finish is visibly worse, the sound of the cutting changes and the chips get hot. Use an eye-glass to inspect cutting edges and identify any signs of