Stuarts use a square cylinder end cover to mount it to the base but as mine has the rounded projection that really needs a round cover to match. So a slice was sawn of some 60mm CI bar, faced and the OD turned. I then flipped it round in the soft jaws to face down to finished thickness and turn the locating spigot for the cylinder.
Once again I used the mating part to gauge the fit of the spigot into the cylinder
The only remaining turning was to bore a shallow recess to give some clearance for the piston lock nut.
Then over to the mill. The clamps are set at approx 45deg so I can use an edge finder to locate X and Y then the drilling can commence, The six 2.5mm holes were later csk on the underside for socket head csk screws. The five 4mm holes are for studs to hold the cover to the base. They are not equally spaced, the ones at 4 and 8 o'clock are a little more forward as I was toying with the idea of adding drain cock bosses to the side of the cylinder but decided not to in the end as I don't really need them with air but the thought is there if anyone wants to try these modifications and run on steam. I went with 4mm as the Stuart specified 2BA (4.7mm) looks a bit bulky particularly with their full size hex heads, my nuts will be 5.5mm A/F.
Two slices from the same 60mm cast iron bar can be cut and machined to the overall sizes of the valve chest and it's cover. Then a spigot turned on the end of the valve chest with a round nosed tool before drilling and reaming for the valve rod. I'm not keen on having to drill a guide hole for the rod at the opposite end of the valve chest so once again deviated from the Stuart design and I will use a separate external guide similar to that found on their No1. I opted for round glands to keep the round theme going but oval ones are not too hard to do on the rotary table of you prefer.
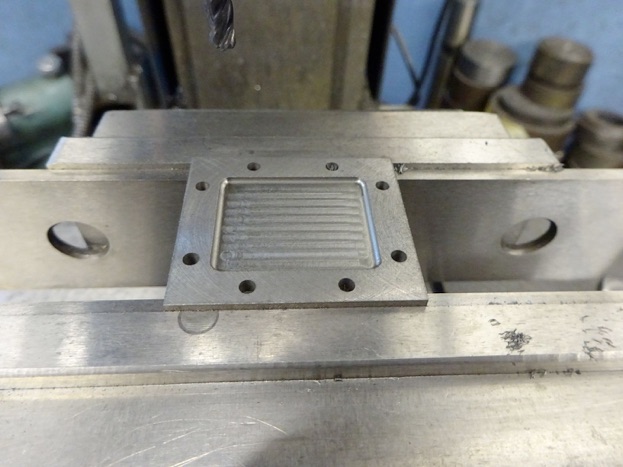
The middle was then stitch drilled out before cleaning up with a 3mm milling cutter and the revised eight hole pattern for the studs drilled. This pattern will allow me to bring the steam/air in through the side of the chest without clashing with a central stud and does away with Stuart’s method of attaching the steam supply to the valve chest cover which can be a pain when you want to adjust the valve as you have to strip out the pipework each time.
The chest cover was drilled straight after and then a decorative recess milled with a 4mm dia x 1mm corner radius cutter.
Part five here. Part seven here.